Jessica Medrea mentored with Morag Hastings in 2021. She came in a fresh doula without very much experience and by the end of the year her business was booming and she could confidently tell clients her doula services were top notch. One of the first things I helped Jessica with, was overcoming the fear of the birth pool set up. If you are a doula who is hoping to add value to your packages or increase your homebirth rate, adding a birth pool to your packages is completely worth the investment. Once you do it you will never go back. Jessica Medrea wrote this guest post for new doulas to follow when you need guidance with adding a birth pool to your offerings as well as how to set and take down the pool while you are at a birth. Thank you Jessica for being so clear with your instructions. 🙂
Owning and offering your own birth pool setup is a fantastic value add for clients. You can put together a kit at not much expense and it quickly pays for itself, either as an inclusion within a slightly higher overall fee or as an optional add-on fee that clients can choose. Hiring a doula that will bring a birth pool and take care of all the logistics is an appealing choice for clients rather than having to source all the equipment themselves.

Here are the supplies we recommend having in your birth pool kit:
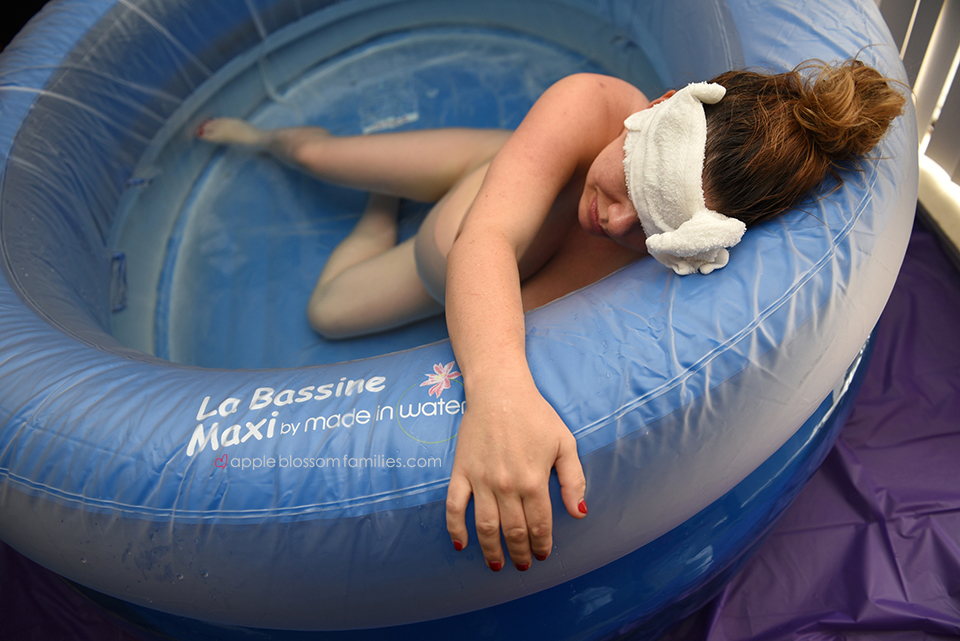
- The pool itself. La Bassine is the most popular brand at the moment. They make 2 sizes: Regular and Maxi. And 2 grades: Personal or Professional. The maxi is larger, offering more space for a birthing person and their partner to move around in, plus more handles for them to use. Some doulas prefer the regular size as it is smaller and lighter making it easier to transport plus faster to pump up and fill with water (and faster to empty it afterwards). The professional grade pools are made out of thicker material and designed to last for more uses. Some doulas find that with adequate care the personal pools can last almost as long, and are preferred for being both lighter to carry and cheaper to purchase. Prices range from $189 to $359.
- An air pump to fill the pool. It’s best to use a portable electric air pump that plugs into an outlet. It should have a few different ends to fit in different size holes. You can get generic ones cheap on Amazon or at a hardware store for around $20-30 or you could invest in a more durable one for around $50 (Coleman makes one).
- A few tap adapters for connecting the hose to household faucets. These can be picked up from Home Depot or similar for $2 to $5. It’s a good idea to have a few different types on hand. The water bandit is a fantastic addition to your bag.
- A submersible pump for draining the pool. You can choose to pay more for a little more power and faster draining time or keep it cheap with a little less horsepower. Some have additional capabilities that are worth considering, like the ability to handle small solids in addition to a liquid. Your pump will cost you from $50 to $100.
- Plastic Sheeting to place on the floor under the pool. Dollar store table clothes will work and can be thrown away each time. You could also invest in a waterproof tarp but then you would have to clean it between uses. Some people use disposable plastic drop sheets designed for painting/construction, but some people don’t like those as they can be sticky on bare feet.
- Something with disinfecting power to wipe down your pool with. Cavi Wipes are popular, a tub of them will set you back around $20.
- Pool liners. You can buy fitted ones for your pool or generic ones. The average price is about $50 each and they are one-time use so factor that into your fees.
- A roll of duct tape. For emergency use to connect a hose to something or cover an air leak temporarily for example. $5 to $10.
- Something to keep everything in. One extra-large rectangular plastic storage bin that will hold everything is a popular choice. $30 to $50 depending what quality/durability you choose.
It’s common practice to ask each customer to provide their own hose since these cost $30-40 each and are one-time use only. The clean hose will be used to fill the pool, but after it has drained the pool, blood, vernix, meconium etc will have passed through and so it’s better to leave it with the clients to do what they wish than to attempt to disinfect and reuse it. They can buy a special drinking water hose to avoid contaminants or just a standard garden hose. You could also supply hoses each time and just factor that into your fees.
It’s a good idea to check your clients’ available faucets before their birth. You can have a look at a home prenatal appointment or have them send you pictures. If they have unusual taps that won’t work with your adapters you can ask them to source their own.
Ask them about their hot water tank performance in advance. They may be able to turn it up for the birth, or you may need to plan for heating large pots of water on the stove, depending on their situation.
Setting up the pool at a birth:
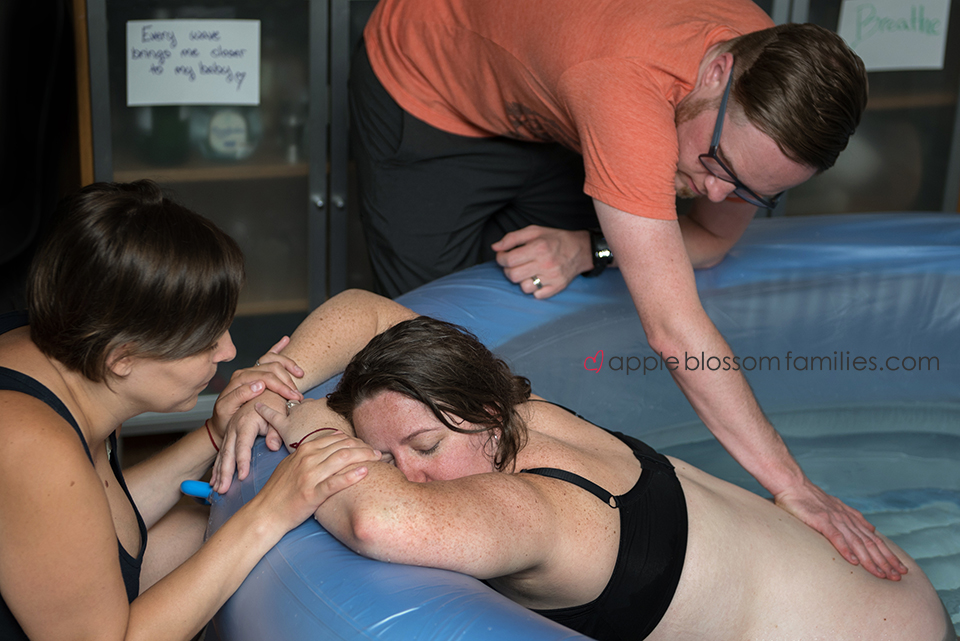
- Layout your plastic underlayer and somewhat unfold the deflated pool on top of it. Choose an area where there will be space for people to move around on all sides of the pool and near an electrical outlet.
- Plugin your electric air pump and use it to inflate the pool. Most pools have one valve for the sides and another for the floor. Do the sides first.
- Line the pool with a pool liner. Don’t forget this step!
- Attach the hose to a faucet with an adapter and run the other end into the pool. Make sure it is laying well on the pool floor and won’t pop out and spray water all over their house.
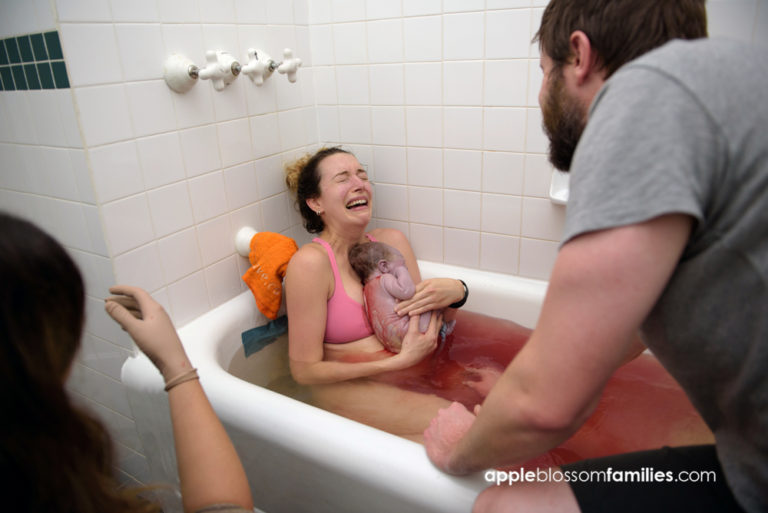
- Fill the pool with water. You are aiming for a warm temperature, like body temperature. Think warmer than a swimming pool but cooler than a bath or hot tub. Sometimes it’s a good tactic to just run full hot and then use cold water at the end to get the right temperature. You can assess by touch or you can add a thermometer to your kit – the ideal temperature is somewhere between 32 and 36 Celsius depending on the birther’s comfort. *It can take 30 minutes to an hour to get the pool filled at the right temperature, or more if the hot water supply is limited.
You can try to keep the water warm when they are not in the pool by buying a special heat-retention cover for birth pools or by using a fitted sheet or something similar from around their house. If the hot water supply is tricky, it can be a good idea to just have large pots of water heating on the stove at all times too.
Taking down the pool after the birth:
- Put on gloves and have a big trash bag ready by the pool. Strain out any solids and ideally flush them down the toilet.
- Attach the hose to your submersible pump and lower it into the water. You may have to switch the ends of the hose. Run the other end of the hose to drain somewhere. Down a toilet is ideal, just push the end of the hose down into the bottom of the toilet and close the toilet seat/lid to hold the hose down. Ensure it is secure to avoid the hose slipping out and spraying dirty water all over the bathroom. If the toilet is not an option you can run it into a bathtub – duct taping the hose to the side of the tub or using the twist ties that came with the hose packaging to secure it to the faucet will help ensure the hose stays in place.
- Plug the submersible pump in and turn it on. It will pump the water out of the pool through the hose. Check the other end of the hose often to ensure it’s draining where it is supposed to and keep an eye on the pump to ensure it doesn’t tip over or start to run dry. Some people use a cutting board on the bottom of the pool to set the pump on to keep it from tipping but we don’t find that necessary.
- As it gets close to empty you can pick up the liner on one side to pool the water towards the pump to get as much liquid as possible out through the pump. Once there’s not enough left for the pump, turn it off and lift it out of the pool. Place the pump in a thick trash bag and/or a bucket or tub – something to contain it and avoid contaminating the rest of your kit.
- The liner will have a little bit of liquid left in the bottom, just gather it up so it won’t spill, bundle it up and put it in your garbage bag.
- Wipe down your pool. You can use your cavi wipes or another disinfectant now, or you can just use a towel to get it really dry and then unfold and disinfect it later when you get home. Make sure it is really dry so it doesn’t get mouldy in your car!
- Plugin your electric air pump and switch it to the deflate setting. Use it to deflate the floor first, then the sides of the pool. Fold your pool up and put it away.
- Pick up and throw away the plastic sheeting from the floor. Use a towel to clean up any puddles left on the floor.
Now you are ready to add the birth pool to your package. Get on it you won’t regret it. If you do I am sure I could find a doula or two who would buy your setup.
Jessica Medrea runs a busy doula business on the East Side of Vancouver, BC. When she is not talking about birth, at a birth or buried in a book about birth she can usually be found enjoying her beloved Hastings Sunrise and Grandview-Woodland neighbourhoods with her dog and very cute toddler. Find out about Jessicas doula services here www.jessicamedreabirth.com/